|
|
Photo Editing Software
The GIMP Tutorial
What is the GIMP?
"GIMP is the GNU Image Manipulation Program. It is a freely distributed piece of software for such tasks as photo retouching, image composition and image authoring. It works on many operating systems (Apple Mac OS X, Mac, Unix/Linux, Windows), in many languages."
Download & Install the GIMP The GIMP is available for download here: http://www.gimp.org/downloads/.
(For help with downloading and installing, see the online documentation at www.gimp.org and the Frequently Asked Questions (FAQ).)
A Few GIMP Basics
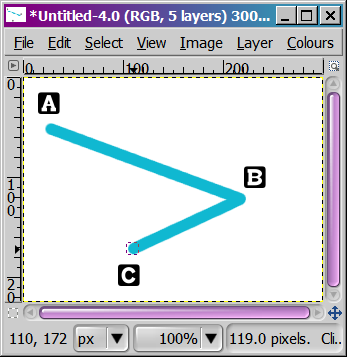
How to Draw A Straight Line
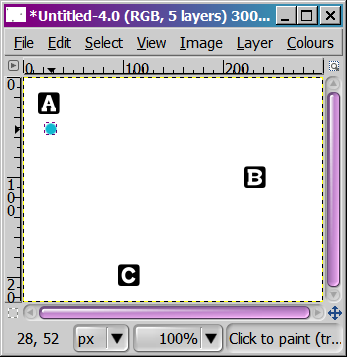
To select a straight line, first choose any of the Brush Tools for Drawing, for example the Paintbrush  . .
Click Left Mouse Button at point A. A dot will appear here.
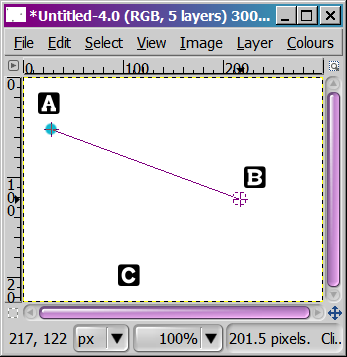
Move mouse to point B and press Shift.
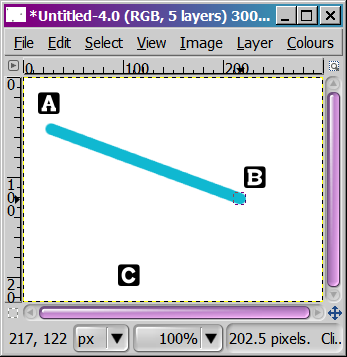
Click Left Mouse Button again to stroke the line.
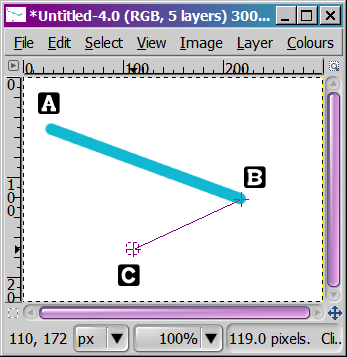
If you want to keep adding points to the line, just continue as before. Move to the next point (C in our example) and press Shift.
Click Left Mouse Button again to stroke the second line.
The other method of drawing lines, is to create the path first using the Path  tool, and then Stroke the Path. The path you choose
can be straight or curved, and you can add any number of points to it. tool, and then Stroke the Path. The path you choose
can be straight or curved, and you can add any number of points to it.
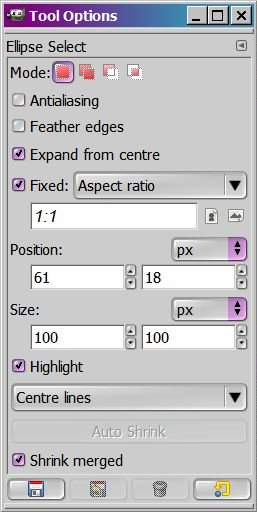
How to Draw a Circle in the GIMP (Drawing Shapes)
First, use the Ellipse Select Tool  to select your circular shape. to select your circular shape.
To select a circle from a centrepoint: start the selection, then press Ctrl and Shift
and continue dragging the mouse until the desired size of circle is selected. (The modifiers: pressing Ctrl constrains the ellipse shape to a
circle, and pressing Shift makes your selection start at the centrepoint.)
In the most recent versions the GIMP, altering your selection is easy too. Just click and drag one of the corner handles (with your
Ctrl and/or Shift modifiers, if applicable). So, you can easily make your circle larger or smaller, as required.
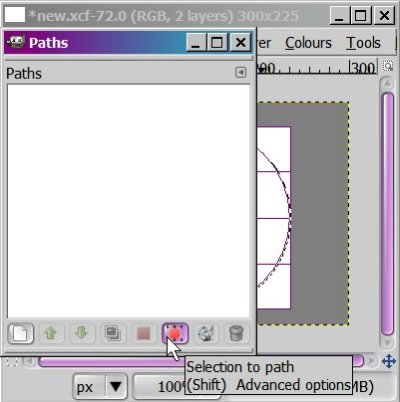
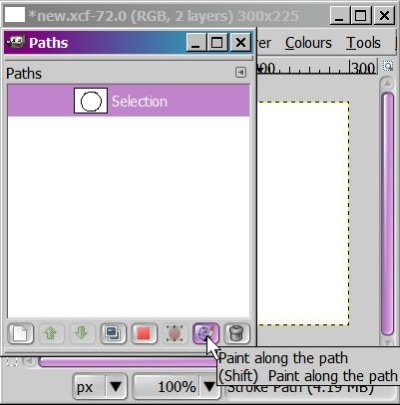
Next, you will want to make sure the Paths Dialogue is visible.
(Choose [image] , if it isn't.)
Then choose Selection to Path  from the Paths Dialogue (or ([image] through the menus). from the Paths Dialogue (or ([image] through the menus).
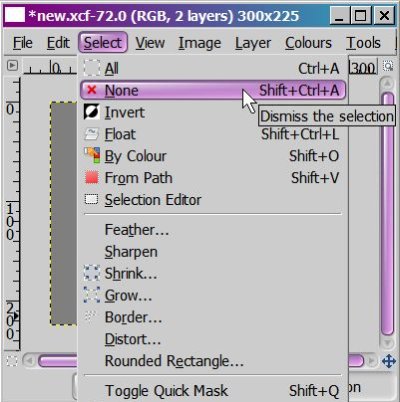
Cancel your selection  through the menus ([image] ) or
pressing Shift+Ctrl+A. (A single click of the mouse anywhere outside the select area will also cancel the selection.) through the menus ([image] ) or
pressing Shift+Ctrl+A. (A single click of the mouse anywhere outside the select area will also cancel the selection.)
Choose Paint Along the Path  from the Paths Dialogue (or ([image] through the menus). from the Paths Dialogue (or ([image] through the menus).
In this example, we are choosing Stroke Line. Alternatively, you could choose Stroke with a Paint Tool instead and use the Paintbrush or one of the other Brush Tools.
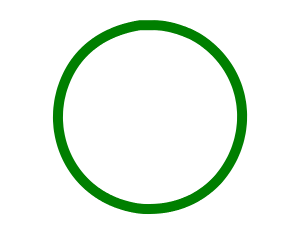
The final result is a circle with nice, smooth edges.
How to Make an Ugly Circle (or Other Shape)
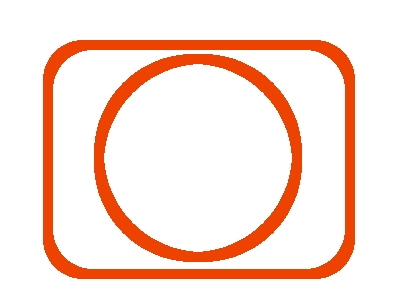
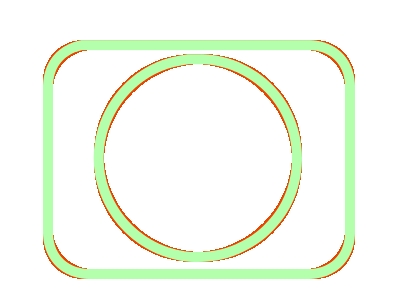
If you select an ellipse or a rectangle with rounded borders, and then Stroke Selection, the result is a
very rough, jagged shape!
The results of using Stroke Selection are shown at right:
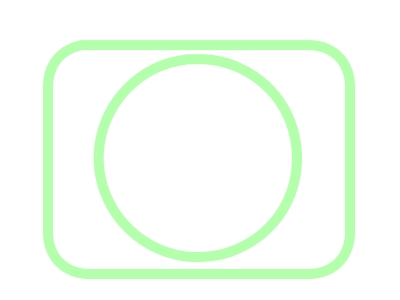
If instead, you use Stroke Path, then the resulting circle will be smooth and anti-aliased.
The difference is illustrated in the overlap in the image at the right:
The GIMP Toolbox
Quick Reference & Shortcuts:
- Selection Tools and modifiers: Rectangle, Ellipse, Free (Lasso), Fuzzy (magic wand), Select by Colour
 , Magnetic Lasso = Intelligent Scissors , Magnetic Lasso = Intelligent Scissors  , Foreground Select , Foreground Select 
- Brush Tools for Drawing: Pencil, Paintbrush
 , Airbrush and Ink tools , Airbrush and Ink tools  , Eraser , Eraser  (these five Drawing Tools work along a line or path, as you Draw, or using Stroke on a selection or path) (these five Drawing Tools work along a line or path, as you Draw, or using Stroke on a selection or path)
- Brush Tools for Modifying an Image: Bucket, Gradient
 , Clone (rubber stamp), Perspective Clone, Heal, Convolve (blur/sharpen), Smudge (smear), Dodge/Burn (lighten/darken) , Clone (rubber stamp), Perspective Clone, Heal, Convolve (blur/sharpen), Smudge (smear), Dodge/Burn (lighten/darken)  (these tools are more commonly used on specific areas of an image, usually in conjunction with Select). (these tools are more commonly used on specific areas of an image, usually in conjunction with Select).
- Transform Tools: flip, rotate, scale, crop, zoom, move, foreground+background color swatch, layers, history, gradients, and drop shadow

- Colour Tools: Color Balance, Hue-Saturation, Colorize, Brightness-Contrast, Threshold, Levels, Curves, Posterize
- Other tools: Path, Color Picker, Magnify, Measure
 , Text , Text 
Finding Help for GIMP Basic Functionality
GIMP Tutorials & Support
The GIMP User Manual contains all the basic information you need to use the GIMP. You will also find GIMP Tutorials for all different skill levels.
You can also get help from other resources such as: the FAQ, forums, mailings lists, books, and IRC support.
Adding Extensions & Plug-ins to the GIMP
There are many useful extensions available for photo editing tasks and much more complicated graphic work. See the GIMP corner for examples of some of the GIMP scripts that are available and how they are used.
|
|